
- Get link
- X
- Other Apps
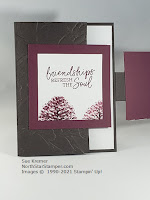
I was asked to share a mystery stamping project at a recent team meeting. This is what I came up with.
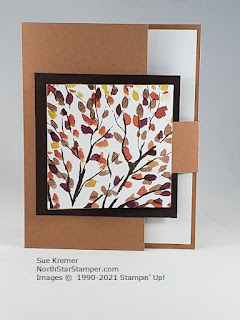
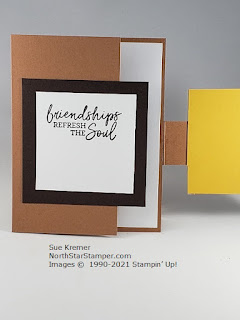
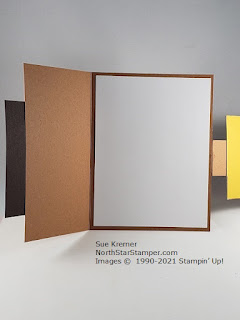
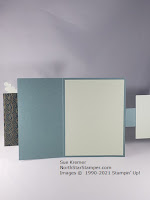
I knew I wanted a fun fold card with some sort of flap, and I like when you see the inner layer from the front, so I cut off 1-1/4" from the front of my standard 5-1/2" X 8-1/2" card base. Using this 1-1/4" X 5-1/2" piece, I scored it in half, and adhered half to the back of my card base to create the flap (arm) that extends across the front of the card. My DSP is adhered to this flap (arm).
TIP: When adhering your squares, be sure not to adhere your card closed!
If you'd like to create this yourself, I used these layers-
Key:
- CS1: Card stock color 1
- CS2: Card stock color 2 (different color than CS1)
- BW/VV: Basic White or Very Vanilla
- DSP: Designer Series Paper
You'll need:
- CS1: 5-1/2" X 8-1/2"
- CS2: 3-1/2" X 3-1/2"
- BW/VV: 4" X 5-1/4"
- BW/VV: 2-3/4" "X 2-3/4"
- CS1 OR CS2: 3" X 3" (won't be seen on front of card)
- DSP: 3" X 3" (will be focal point of card)
Steps;
1. Score 5-1/2" X 8-1/2" in half at 4-1/4"
2. Cut off 1-1/4" from one side. The short side will be the front of your card.
3. Score that 1-1/4" X 5-1/2" piece you cut off in step 2, at 2-3/4"
4. Adhere folded piece from step 3 onto back of card base near middle of card vertically, with the scoreline at the right edge of card. The flap will fold to the front of the card, and be adhered on the back.
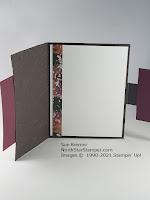
5. Adhere 4" X 5-1/4" inside card (will be seen from front on right side)
6. Stamp on 2-3/4" X 2-3/4" BW/VV as desired. This is a good place for a sentiment.
7. Adhere 2-3/4" X 2-3/4" onto 3-1/2" X 3-1/2". Adhere this in middle, front of card base (making sure adhesive is not on the far right side of square, or you will adhere card closed.)
8. Adhere DSP square (3" X 3") onto flap made in step 4, making sure to only put adhesive on the flap, centering over larger square.
9. Adhere 3" X 3" CS1 (or CS2) onto back of DSP square. This just makes for a cleaner inside.
Options:
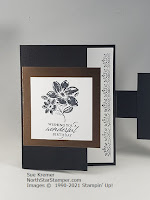
-Emboss front flap before adhering 3-1/2" square, as I do in the Early Espresso card below.
-Stamp or emboss any layer to add interest.
-Add embellishments to front focal point square.
-Add sentiment to front focal point square.
I embossed the front flap and included a small strip of DSP inside the card.
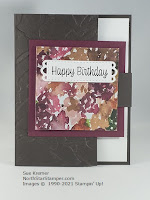
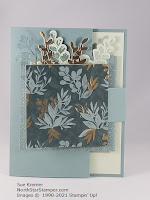
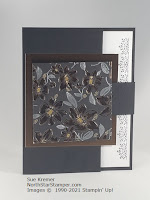
I stamped and die cut several elements to step up this version. Also, my 3-1/2" X 3-1/2" piece is DSP here.
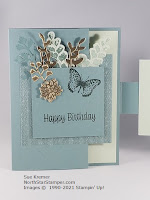
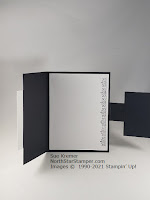
This one I kept more simple and used some specialty DSP.
Reach out to me if I can help you create your own flap card.
Comments
Post a Comment